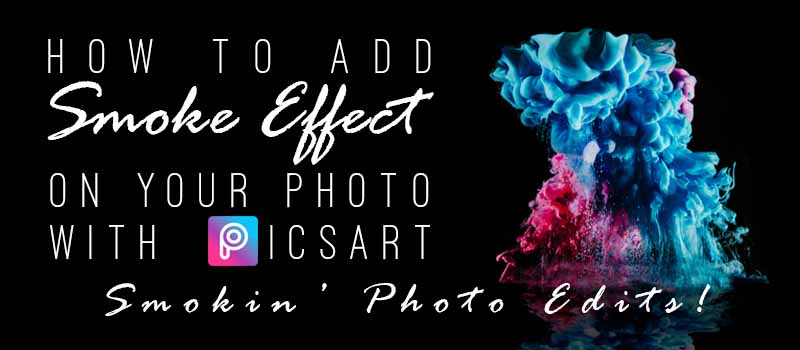
People always come up with creative ways to make photos stand out. One of the popular editing techniques nowadays is the “Smoke Effect”. It’s undeniable that the effect makes your photos look cooler, so learn how to achieve it with the PicsArt app!

Contents
Create Your Sticker
Before applying the “Smoke Effect” on your photo, you need to create a sticker first to make the editing easier and more seamless. Follow these steps to prepare your photo for the great Smoke Effect edit:
- Tap the
 button.

2. Search for a photo.


- You may also choose a photo from your gallery or snap a new one with your camera.
3. Tap “Tools”.

4. Select “Cutout”.

- You can either do it manually or have PicsArt highlight the subject you want to cut out.

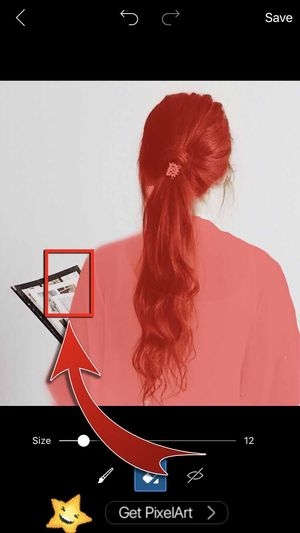
5. Tap the Brush tool and then refine the area you want to cut out.

- You may resize the brush for more precision.

6. Tap the Erase tool and then remove the parts you want to exclude.
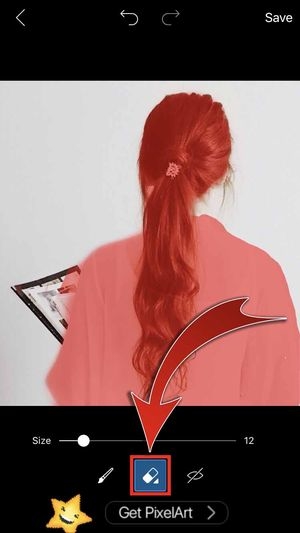

- You may resize the eraser for more precision.

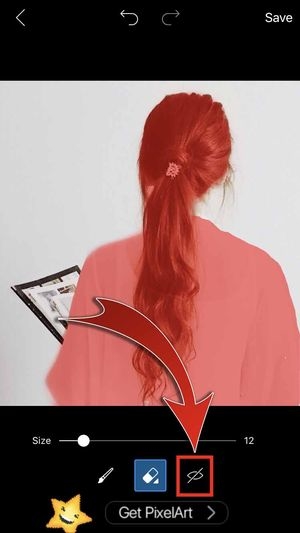
7. Tap the View tool to view the image as a sticker.

8. Press “Save”.
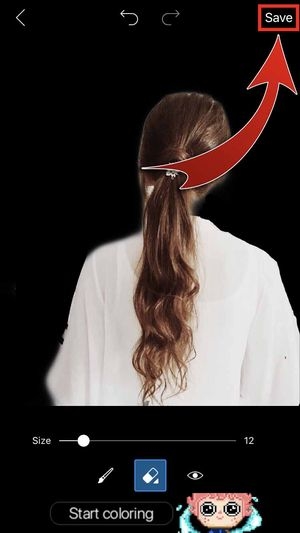
- You have created a sticker!

Adding the Smoke Effect
After saving your sticker, you are now ready to add the “Smoke Effect”! Check these steps out to begin your smokin’ hot edits:
- Tap the button.
2. Swipe up and select “Create New”.


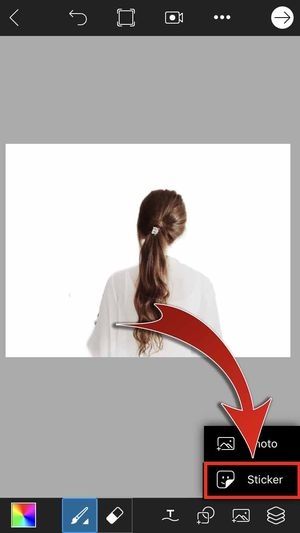
3. Tap the Photos button.

4. Press “Photo”.

5. Tap the sticker you recently created.

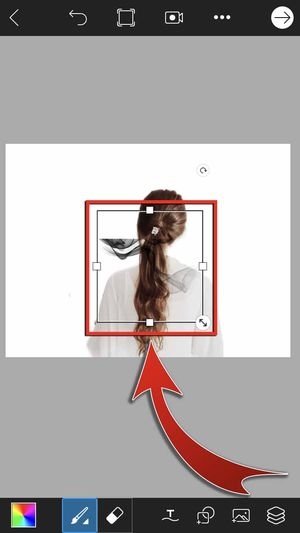
6. Resize and reposition the sticker to your background.

- You may also change the background color or choose a background photo. Simply view your Layers, select the Background layer, and then choose a color with the Paint Bucket tool.


7. Tap the Layers button.
8. Press the Add Layer button and choose “Empty Layer”.


9. Hit the Photos button again and select “Sticker”.

10. Search for “Smoke Effect”.

11. Swipe and choose your Smoke Effect!


12. Adjust, resize, and rotate the Smoke Effect sticker to your photo.

- Apply as many Smoke Effect stickers as you want!

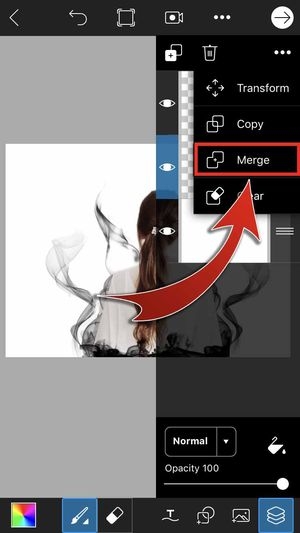
13. Tap the Layers button.

14. View the Options.
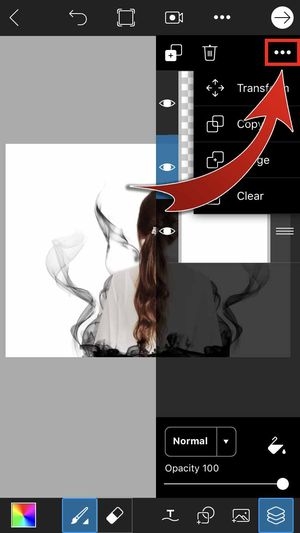
15. “Merge” the sticker you created with the background layer.
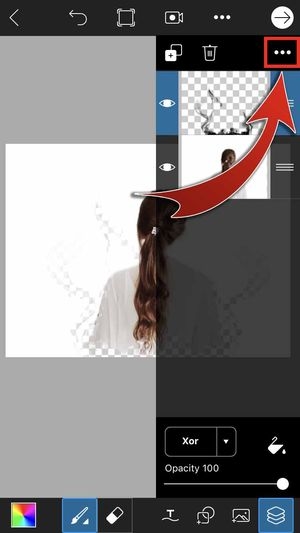
16. Tap the Smoke Effect layer.

17. Press the Effects button and then select “Xor”.


- Your Smoke Effect will be pixelated.

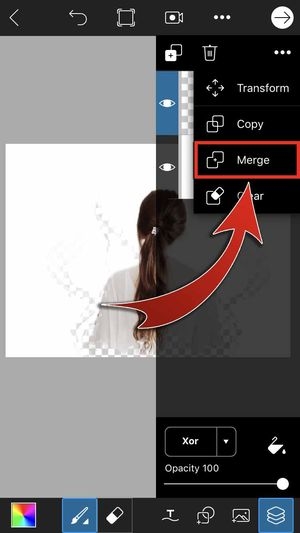
18. “Merge” the remaining layers.
19. Add another “Empty Layer”.


20. Drag the empty layer to the bottom.


21. Press the Color button and then use the Eyedropper tool.


- Select a color from your photo!
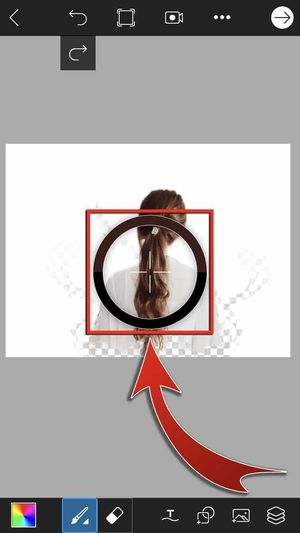
22. Tap the Brush tool.

- You may adjust the “Size” and “Opacity” of the brush.

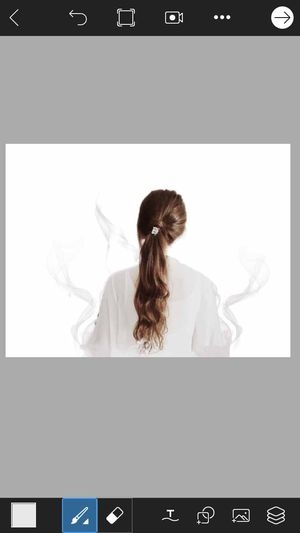
23. Drag the brush along the pixelated Smoke Effect.
- You have added the Smoke Effect to your photo!
Show off your smokin’ photo edits to your friends online! Save your Smoke Effect photo and share it on SNS.
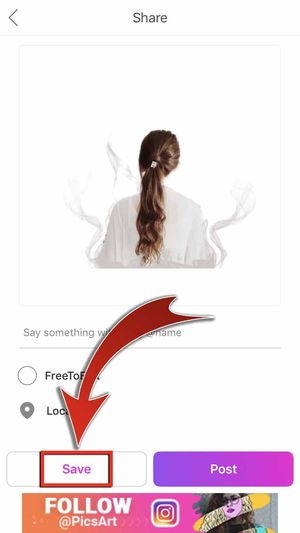
- Tap the Next button.

2. Tap “Save and Share”.

3. Press “Save”.
4. Hit “Save” again to store the photo to your phone.
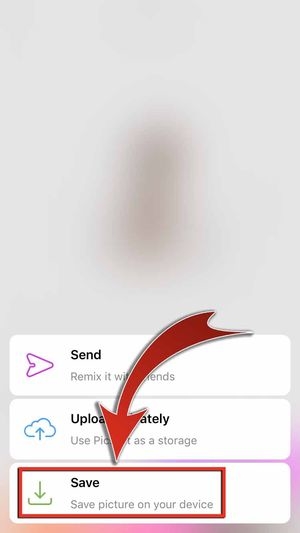
5. Press “Done”.

- You have saved the Smoke Effect photo to your phone!

6. Choose “Facebook Post”.

- You may also share on other SNS.
7. Caption your post!

8. Tap “Next”.

9. Hit “Share”.
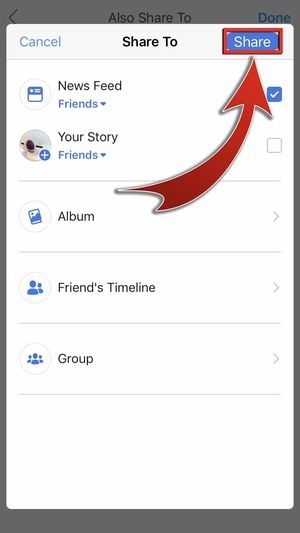
- You have posted your Smoke Effect picture on Facebook!

Smokin’ Photo Edits!
Adding the “Smoke Effect” can be a little tricky, but your photos will definitely look more amazing after! Impress your friends with PicsArt’s feature and take your photo-editing skills to the next level. Get the best photo editing app, apply the “Smoke Effect”, and share online. Experience all these with PicsArt!


