
You can easily capture a beautiful moment with you camera. However, the photos may not always turn out the way you want. Perhaps the colors are dull and washed out. Adjust the colors of your images with Adobe Lightroom CC app! With simple adjustment controls, you can enhance the colors to recreate your special moments just as you’ve seen them.

Contents
Download
![]()


Control the color!
Keep your image colors vivid with automatic and manual adjustment tools. Balance the overall pigments and individual tones with your fingertips!
- Launch Adobe Lightroom CC app and tap the Edit Photo button.

- Choose a photo to edit.

- You’re ready to edit your photo!

White Balance
Adjust the intensities of the colors of your photos! Correctly render specific colors in an instant with automatic presets or manual slider controls.
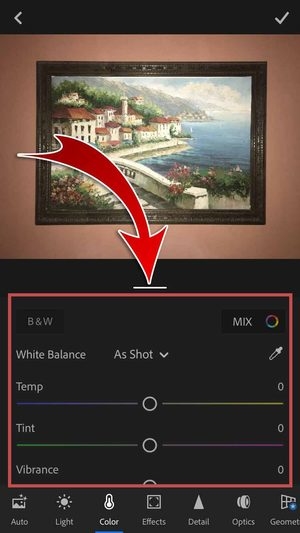
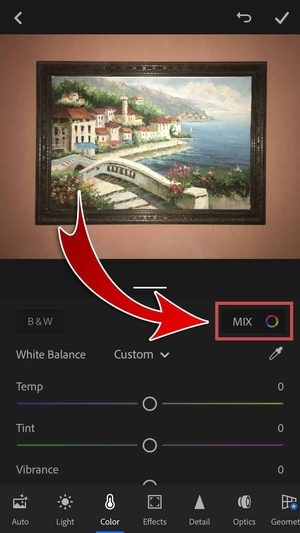
- Tap “Color”.

- Adjust the colors of your image instantly or manually!
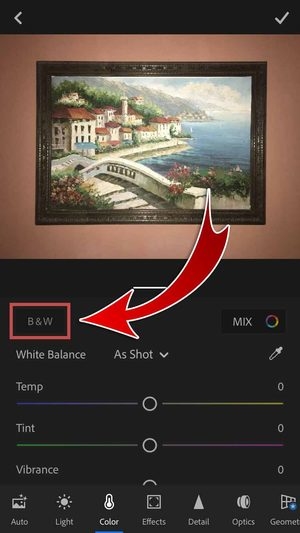
- Turn your photo black and white instantly by tapping “B&W”.
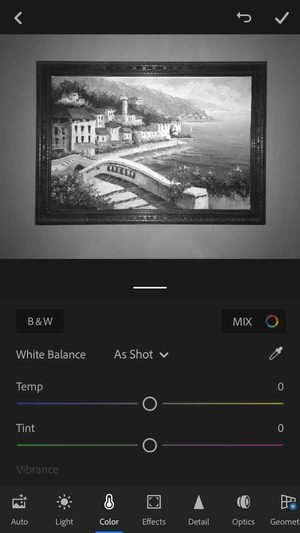
- You have made a black and white photo!
- Open the menu for different preset “White Balance” options.


- Revert back to original colors with “As Shot”, get instant color adjustments with “Auto”, or manually control the color intensities with “Custom”.
- Use the White Balance Selector to control colors by sampling specific areas in your photo.
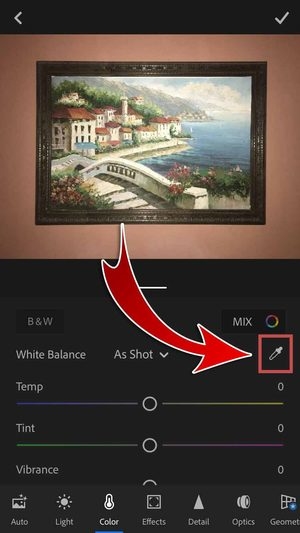

- Specify a neutral area in your photo and then tap the Check-mark.

- You have customized your image colors!

- Fine tune the white balance further with Temp and Tint.
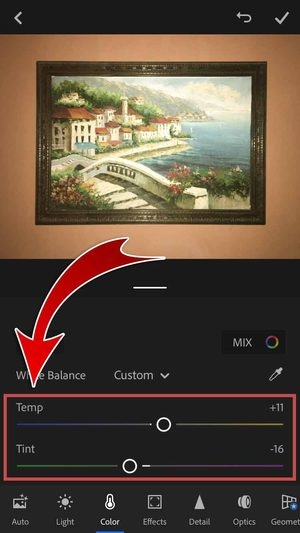
- Temperature determines how cool or warm your colors are while Tint determines how green or magenta the colors appear. Offset the values by adding or reducing colors from the opposite spectrum.
- Control the vividness of the colors with Vibrance and Saturation.

- Vibrance increases the intensity of the lower-saturated colors while Saturation boosts the overall intensity of the colors in the photo.
- You have edited the light settings of your photo!
HSL Sliders
Fine-tune individual colors of your photos with sliders that control their overall Hue, Saturation, and Luminance (HSL)! Instantly adjust the tones, intensity, and the brightness of your image colors.
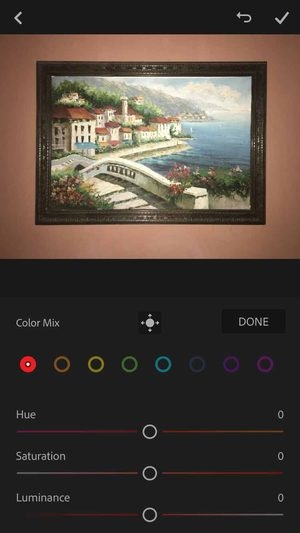
- Individually control the general color groups of your photo.
- Adjust HSL sliders in the Red, Orange, Yellow, Green, Aqua, Blue, Purple, and Magenta channels.
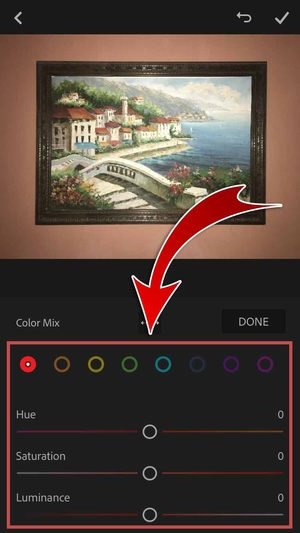
- Use the Target Adjustment tool to adjust specific colors in your photo.

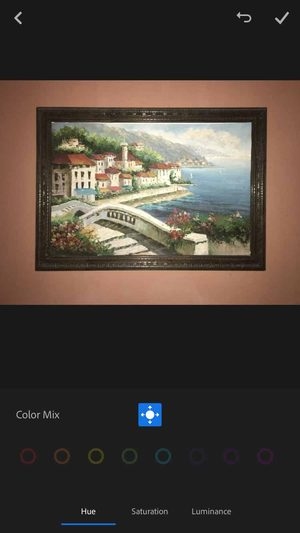
- Go to the “Hue” tab to adjust the actual color tones.

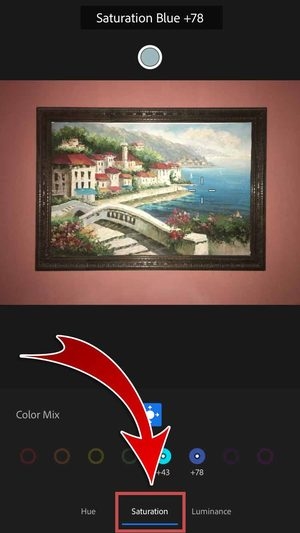
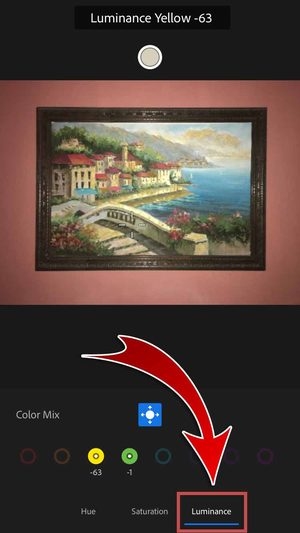
- Tap and hold an area to select a color.

- Drag and swipe to adjust the levels!

- Do the same in the “Saturation” and “Luminance” tabs!
- Tap the button to exit the Target Adjustment tool.

- Tap “DONE” when you’re satisfied.
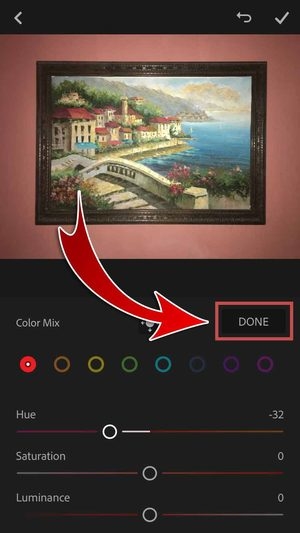
- You have adjusted your image colors!

Keep a copy of your edited photo and show all your friends on SNS the power of Adobe Lightroom CC app!
- Tap the Check-mark.

- Tap the edited photo.

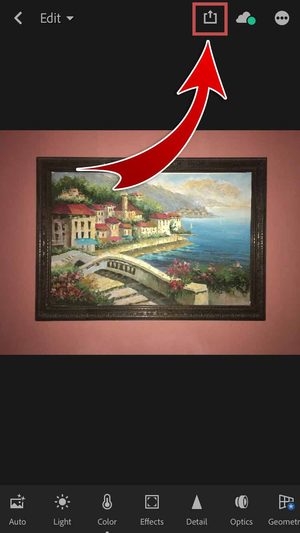
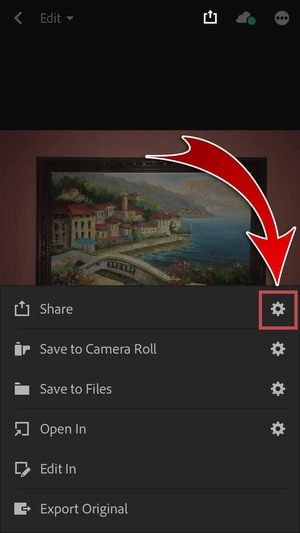
- Hit the Save and Share button.
- Keep a copy in your gallery! Choose “Save to Camera Roll”.

- Choose the “Maximum available” image size.
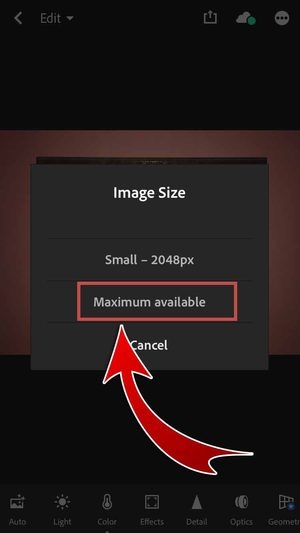
- You may also select Small – 2048px.
- You have saved your edited photo in your gallery!

- Share your edited photo on SNS! Tap “Share”.

- You may include a watermark to your photo before sharing.

- Choose the “Maximum available” image size.

- Hit “Facebook”.

- You may also share your edited photo on other SNS.
- Type a caption and hit “Post”.

- You have posted your edited photo on Facebook!

Mobile Image Management
Adobe Lightroom CC app will definitely enhance the brilliance of your photos with its color correction tools! Balance the intensity of hues with simple gestures. Dragging simple sliders allows your photos to radiate with warmth or shimmer with coolness. Sample colors in your images to automatically balance the vividness and further fine-tune the levels with individual color channels. Instantly adjust image colors with Adobe Lightroom CC app today!


